
Geocoders: make every geologist log data the same way
Per-table validation rules, the data entry assistant and selectors (text, date, image, rotation) for consistent data across geologists.
Geocoders: make every geologist log data the same way
Geocoders
Geocoders are a set of defined rules that facilitate and validate the entry and modification of a tuple's attributes in a table. They can be assigned to vector layers from the
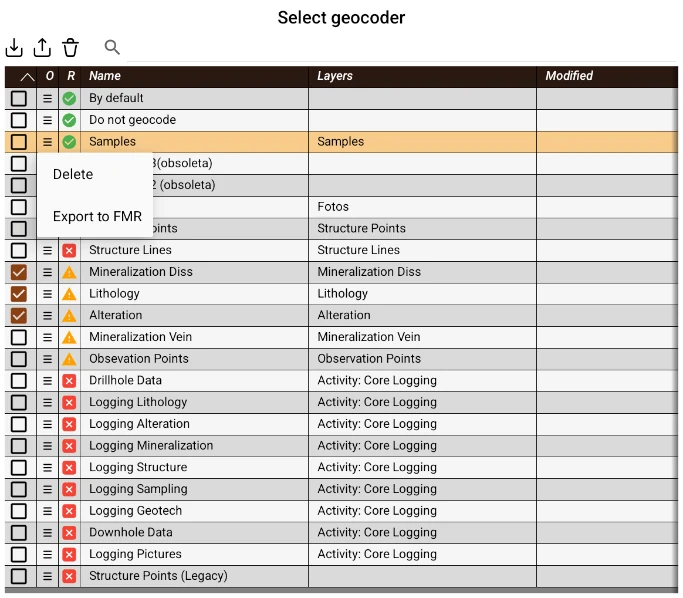
Layer Menu, using the geocoder manager.
First, there is the “Default” item, which generically adapts to the table and provides minimal assistance. Below is “Do not geocode”. When you select this option, after creating a geometry on the map or a new entry in the table, the assistant will not open and the tuple will keep its attributes empty. Below, all the geocoders defined in the project are listed. The geocoder currently associated with the layer will appear highlighted, and you just need to tap another item to assign it. You can only assign compatible geocoders  with the table, since it has all the attributes required by the geocoder. There are also the ones compatible with the icon
  : this indicates that the table has all the mandatory attributes defined in the geocoder, but lacks at least one non-mandatory attribute. Finally, the incompatible ones are marked with
Note: Geocoders cannot be created or edited from the application: they are defined in the geocoder editor spreadsheets. The sample spreadsheets and their manual are downloaded as a .zip file from the web panel, in the Subscriptions section, with the "Geocoder editor (ZIP)" button. If you do not see it, ask support for it.
The same .zip includes a skill for artificial intelligence assistants that work with the files on your computer, such as Claude Code, Codex or Gemini CLI. With it, the assistant modifies and validates the spreadsheet from plain-language requests, for example "add Dacite to the lithology list, only for the Volcanic group" or "make the sample weight mandatory only for core samples". How to install and use it is explained in the last chapter of the Geocoders editor manual.
You can manage them from that same window, using the Resource Manager's top button bar: import geocoders from .fmr files or directly from the generator's spreadsheet (.xls, .xlsx or .xlsm) and, by selecting one or more with their checkbox, export them as .fmr or delete them from the project.
Data Entry Assistant
When creating a new item in the database or editing an existing one, the data entry assistant will open, which is based on the rules of the selected geocoder to fill in the attributes of the associated table.
The assistant is made up of a set of user interface (UI) panels organized in series. These panels, called selectors, vary their components to adapt to the type of data to be surveyed and the entry method. Commonly, each selector is associated with one of the attributes of the tuple being edited; however, there are selectors capable of surveying more than one attribute (such as the Rotation selector, used to measure structures). It is also possible for the geocoder to ignore certain table attributes, so their values cannot be assigned through the assistant.
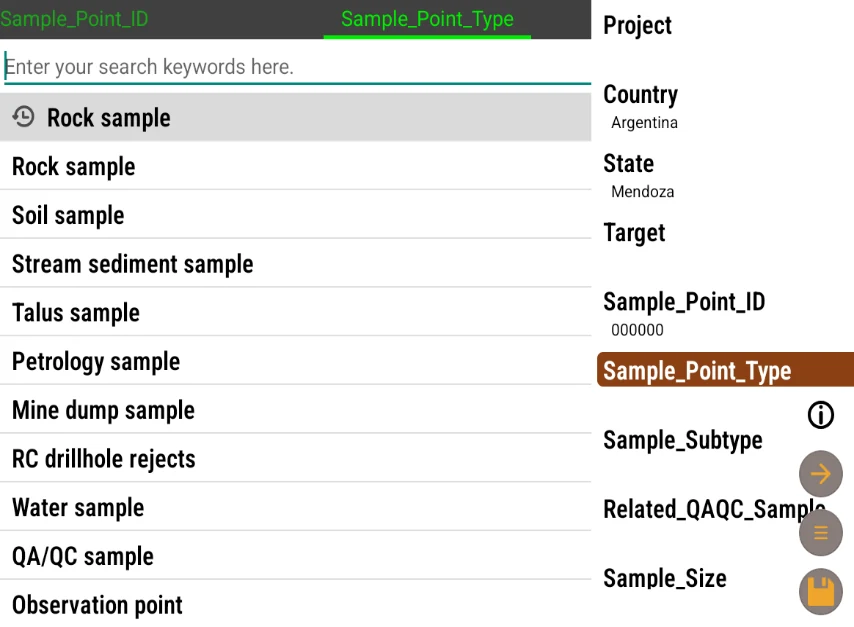
In the header of this interface you can see the name of the current selector, along with an indication of the previous and next ones. You can navigate between them in four ways: by assigning a value, by swiping left or right with your finger, by pressing the button, or through the selectors menu, which opens by pressing the  button or by dragging it from the right edge of the screen.
Holding down that same button pins the menu next to the form instead of overlaying it as a sliding panel — handy for keeping the selector list always visible. A single tap on the button hides it again.
When switching selectors, the assistant may skip one or more intermediate selectors. This may be because the geocoder considers them unnecessary, or because they are optional. In the latter case, you can go back to edit them. If the geocoder does not correctly validate a field, it will not let you advance until you comply with the established rules, and it will show an error message.
In some selectors you will see an icon  on the right side of the screen; tapping it will give you more help about how the current selector works.
Types of Selectors
Most selectors have a text field at the top, which will sometimes be editable and sometimes not. Below this field, it is common to find a list of
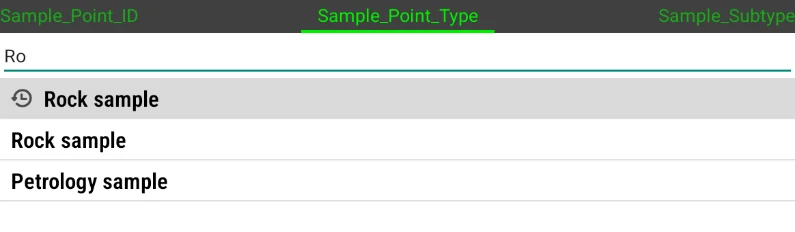
selectable items (as long as it is enabled), which can be filtered by typing in the mentioned field. Sometimes, the first items show an icon, which indicates that they are suggestions based on recently used values. 
There is a
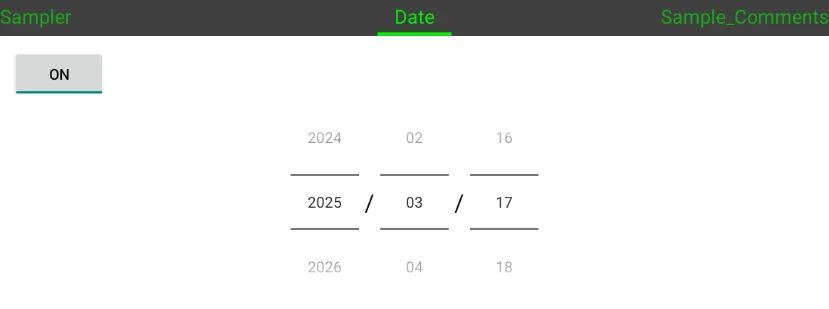
date selector, with which you can assign the date, the time, or both to a certain field. It also has an on/off button that, when disabled, indicates that the field has no assigned value.
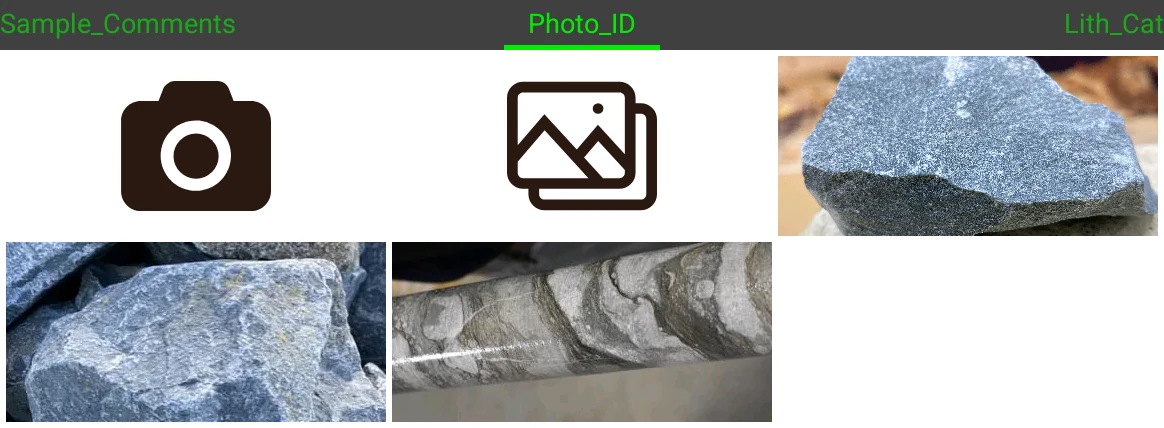
The image selector allows displaying and assigning images to a text attribute of the table. Its interface consists of a gallery of associated images. Tapping them opens them in the system's default viewer. The first item lets you capture and assign new images using the camera, and the second assigns them from the system gallery. Images are stored as files in the project folder /Documents/Fieldman projects//DCIM, with names set by the geocoder's rules. The database attribute stores the names of these files, separated by commas. Field Manager supports two cameras: the native Android camera (device-dependent) and an experimental camera included in the application. You can select the preferred camera from the general preferences window, under the option "Use native Camera". Long-press a thumbnail to ask for confirmation and delete the image (removes both the attribute and the file). This only applies to the selector in edit mode: in read-only uses (tuple pop-up, data browser) the long press does nothing.
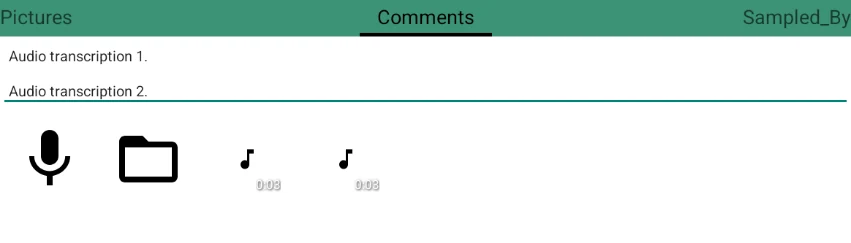
The audio selector lets you record, import, and play voice notes associated with a text attribute of the table. Its interface is an audio gallery: the first item (microphone icon) starts and stops recording -the first time, the Microphone permission is requested-, and the second imports an existing audio file. Below, the already associated audios are listed, each with its duration. Files are stored in the folder /Documents/Fieldman projects//Sounds, and the database attribute stores their names separated by commas. Above the gallery there is an optional comment field for AI transcription.
Tapping an audio opens a player with the usual playback controls (play/pause, previous/next, speed, and stop) and a scrollable progress bar. A long press on an audio offers the option of opening it in the system’s default player or deleting it (asks for confirmation and removes both the attribute and the file). Just like with photos, this only applies to the selector in edit mode, not to read-only uses.
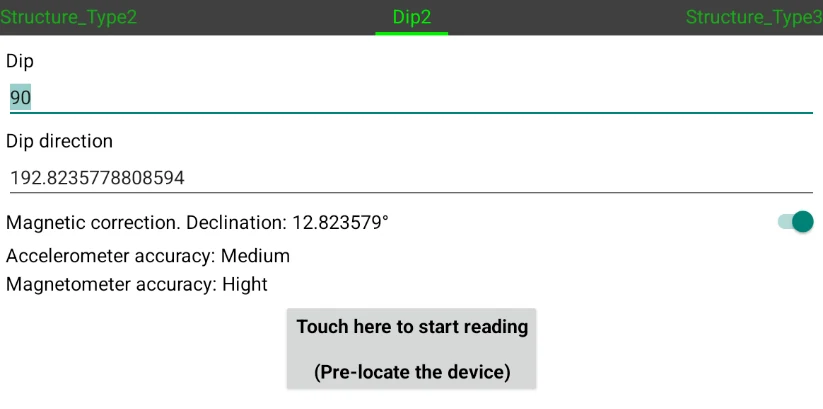
The rotation selector is useful for measuring geological structures (planes and lineations), using the device's rotation and compass sensors. The interface may show different attributes (dip, dip direction, azimuth, plunge, trend, strike, etc.), defined by the geocoder. You can enter the values manually or, if the device has the appropriate sensors, activate the measure button. To do this, place the device stably on the plane to be measured and hold it steady for a few seconds until the values load automatically. The application also obtains the magnetic declination at the current position; if you enable the corresponding checkbox, it will be applied automatically to the compass measurement.
If, while measuring, the magnetometer's accuracy drops to low or unreliable, the selector shows a Calibrate now shortcut that opens the compass calibrator to recalibrate it without losing the measurement in progress.
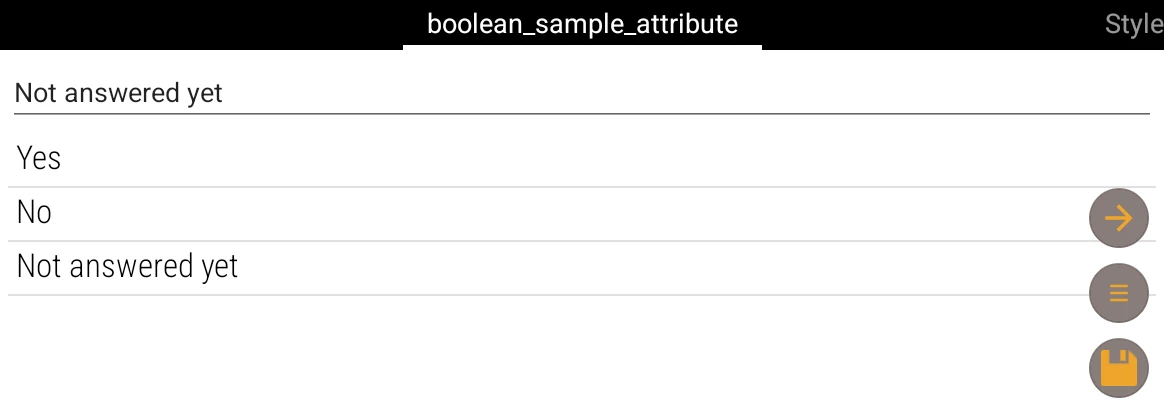
The boolean selector, used for BOOLEAN fields, is shown as a list of three options —"Yes", "No" and "Not answered yet"—, with the field showing "Choose an option" while none has been picked, and works like any other code selector. The third option leaves the field with no value, which is not the same as a deliberate "No": if the field is mandatory, the assistant will keep asking for it until you pick "Yes" or "No".
After the last selector, the changes will be saved and the assistant will close automatically. You can also exit at any time by pressing the  button.
AI audio transcription: audios recorded with the audio selector can be automatically transcribed to a text field. It requires configuring a Google Gemini API key in AI Integration… (see Preferences Window), which includes a link to get the key at Google AI Studio and a Test button to verify it.
With the key configured, the audio selector offers the Transcribe audios with AI button for the current tuple, and each layer's menu offers the Transcribe… option to batch-process all tuples with pending audios (with an optional date filter). The transcription is written to the transcription field defined in the geocoder.
When the geocoder does not match the table
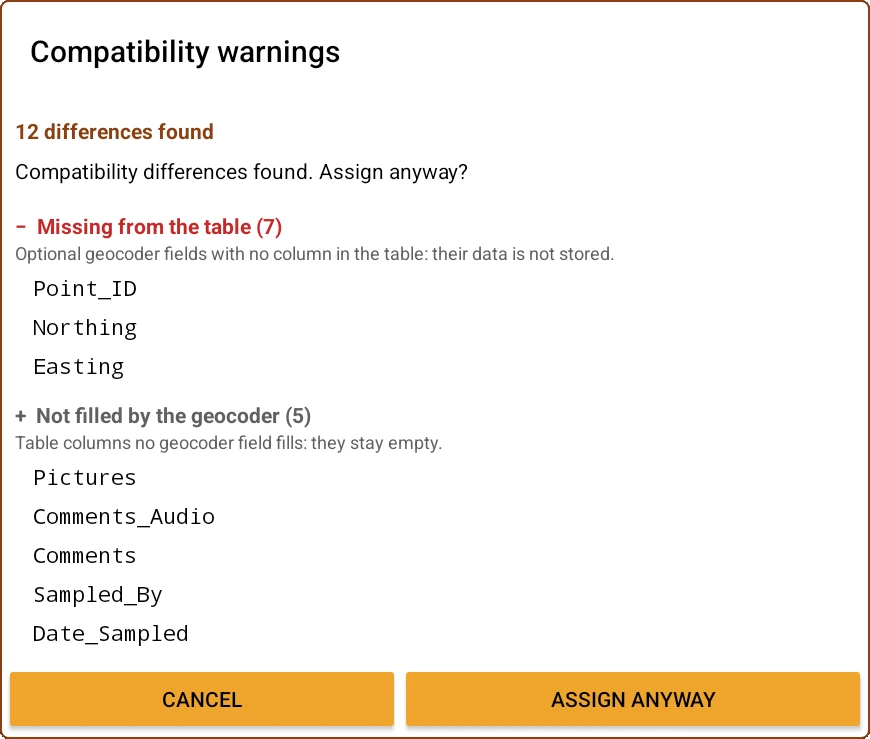
When you assign a geocoder to a layer whose fields do not fully match the table's, the application shows the "Compatibility warnings" dialog, headed by "N differences found" —or "N differences · M likely renames" when it detects similar names—, with the differences grouped into three sections:
- "Renamed (N)" — "Same field with a different name. The geocoder will NOT write into that column." The characters that differ are highlighted, so you can see at a glance where the difference is. The typical case is an import that sanitised the names:
Min_Minerals1.2becameMin_Minerals1_2. - "Missing from the table (N)" — "Optional geocoder fields with no column in the table: their data is not stored."
- "Not filled by the geocoder (N)" — "Table columns no geocoder field fills: they stay empty."
The "Assign anyway" button confirms the assignment regardless, after the question "Compatibility differences were found. Assign anyway?". It is worth reading the renamed section before accepting: that is the one that makes a field you believe you are filling never reach the column you expect.
You may also see two related notices: "Rule «…» is compatible with layer «…», which has no geocoder assigned.", when a layer could be using that geocoder and does not have it, and "Layer […]: an error occurred validating the geocoder, so it was left unassigned.", when validation fails and the layer is left without a geocoder.
You've read enough. Try it with your own project.
20 days free, with your data. If you get stuck: the manual — and us.
Secure payment with Stripe · Cancel anytime.