Dynamic styles: colour samples by grade and lithology by unit
Point, line and polygon styles, plus SQL-condition dynamic styles to see geochemical grades or lithology classes right on the map.
Dynamic styles: colour samples by grade and lithology by unit
Styles
Each geometry drawn on the map (and in the strip log) will be represented with a particular visual format. These styles can be stored as an attribute embedded inthe geometry, which is supported by the TAB and KML formats but not by SHP; or they can be dynamic styles, which are generated by evaluating the table's attributes under certain conditions, a topic that will be covered in the next section.
A dynamic style can also arrive on its own, on import. If a MapInfo .TAB carries a graduated thematic map (the last one applied to that table in MapInfo), the import translates it into a dynamic style by ranges, editable like any other, instead of discarding it - the same criterion already applied to a Shapefile's .lyrx sidecar (see Resource Manager).
The style selector will be shown to define each layer's default stored style when sampling into an empty table. You can assign this attribute from the geocoder (see Geocoders), which you can access after creating a new geometry or by tapping an existing one and selecting the Edit attributes option. It will also appear while editing dynamic styles.
The window has a visual sample of the style. By tapping it, you can access the history of styles based on pre-existing geometries. Below are the controls to edit the style's visual attributes.
Point Style
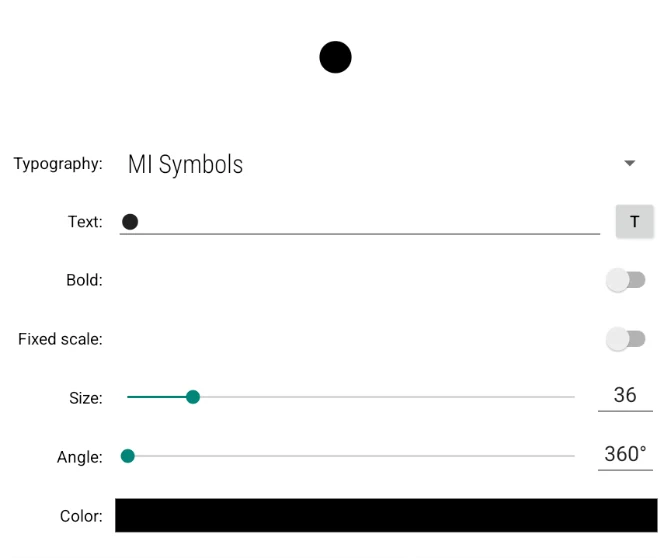
Point styles are represented by a text string with symbols from a specific font. Field Manager includes a set of common fonts compatible with other GIS. If you want to add more fonts to the application, simply copy the compatible files (TrueType, PostScript Type 1, and OpenType Font) into the /FieldMan/data/fonts folder and completely restart the application and its background processes. If the app does not recognize them, try restarting the device.
The attributes of this style are:
- Typography: Tap the description or the arrow to display the list of available fonts.
- Text: You can enter a text to display, or tap the “T” button on the right to open a list with the visible symbols of the selected font and choose one.
- Bold: When enabled, it increases the thickness of the symbol's border.
- Fixed scale: When enabled, the symbol will keep its size relative to the zoom level. If disabled, it will keep a constant size regardless of the zoom.
- Size: Defines the size of the symbol.
- Angle: Mathematical angle of the symbol ( θ = ( 450 − azimuth ) mod 360 ).
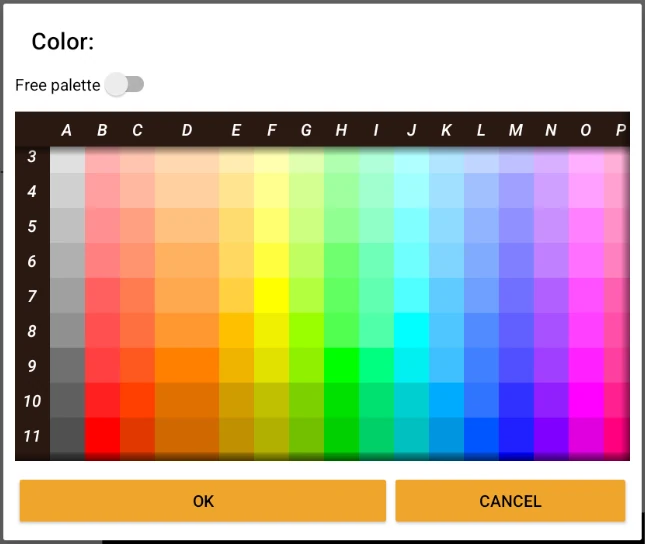
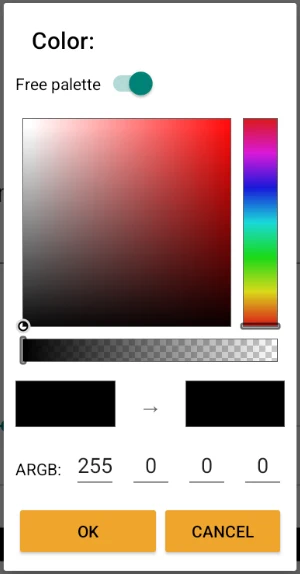
- Color: Tapping this control opens a dual selector, which lets you choose between a standard color matrix or a free palette, which also allows defining colors with transparency.
Line Style
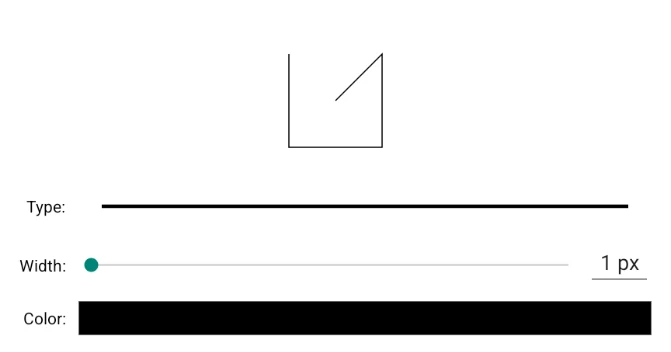
Line styles have three main attributes:
- Type: Tapping the line opens a menu that lets you select among different types. For asymmetric styles, you can invert their orientation by changing the direction of the geometry in the Geometry Editor.
- Width: Lets you define a thickness between 1 and 7 pixels, or alternatively between 0.1 and 6 points, depending on the chosen measurement system.
- Color: Defines the line's color, using the same selector available in point styles.
Polygon Style
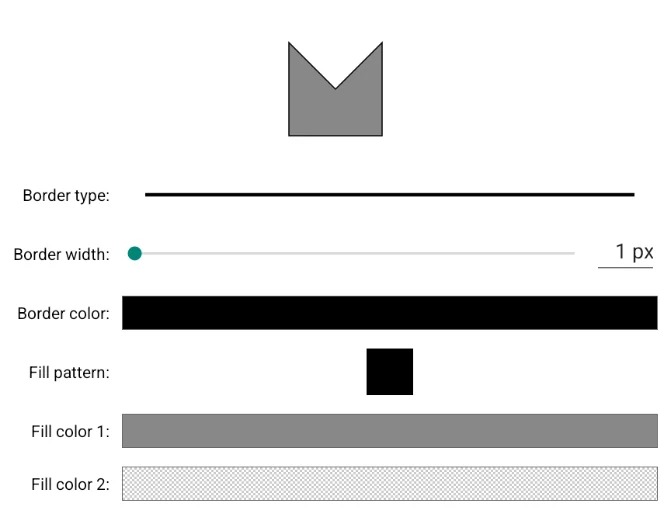
Polygon styles include the following attributes:
- Border type, width, and color: These three behave the same as in line styles and are applied to the polygon's outline.
- Fill pattern: Tapping this option opens a list of patterns that can be assigned to the polygon's interior. Each pattern combines two configurable colors.
- Fill color 1 and 2: Tapping them opens the color selector dialog, where you can define both fill colors.
Dynamic Styles
Dynamic styles are designed to create thematic maps, based on rules applied to key attributes of the table. Therefore, if you modify one of these values, the appearance on the map will also change, overwriting the stored style.
They are especially useful for graphically representing one or more attributes of a tuple, for example: gold concentrations in geochemical samples, different lithologies in geological maps, structural points, etc.
These styles can be created, edited, exported, and assigned to vector layers from the Layer Menu.
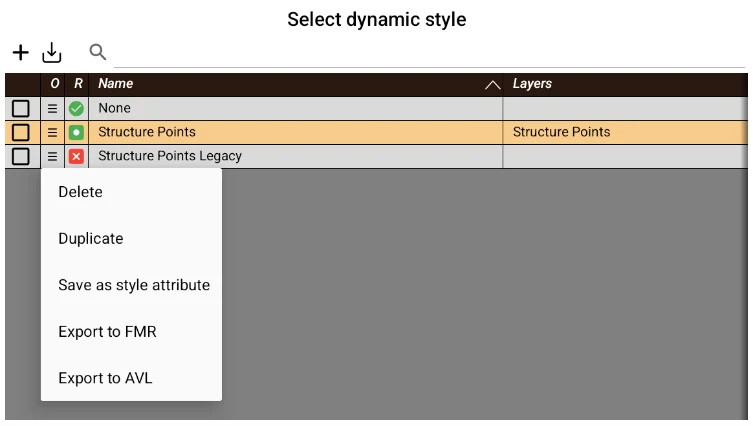
Dynamic styles management window:
This window shows the complete list of the project's dynamic styles. When you tap one of them, it will be automatically assigned to the selected layer (as long as they are compatible), and the window will close. When you reopen it, the chosen style will appear highlighted.
The None item leaves the layer without an associated dynamic style.
At the top of the window is the same button bar as the Resource Manager: it lets you create a new style, import styles from .fmr files or from an ArcGIS .lyrx, and, by selecting one or more styles with their checkbox, export them as .fmr or delete them in bulk.
Dynamic styles can be of point type  , line
  or polygon
  . It can also be incompatible with the layer
  if the style references attributes not present in the table. If you select this last type, a copy of it will be created and the editor will open to modify the incompatible attributes.
Tapping the menu button on any item opens a panel with the following options:
- Edit: Opens the editing window.
- Delete: Deletes it from the project, even if it is in use. This action cannot be undone.
- Duplicate: Creates an editable copy.
- Save as stored style: Replaces the stored styles (fieldman_style system columns) of all geometries of the same type with those resulting from this dynamic style.
- Export as FMR: Saves the style as a Field Manager resource file. It can be imported on another device from this same window or from the Resource Manager.
- Export as AVL: Exports in ArcView's Attribute Value List (AVL) format. The application partially supports it and it is compatible with several ArcGIS products.
Dynamic style editor:
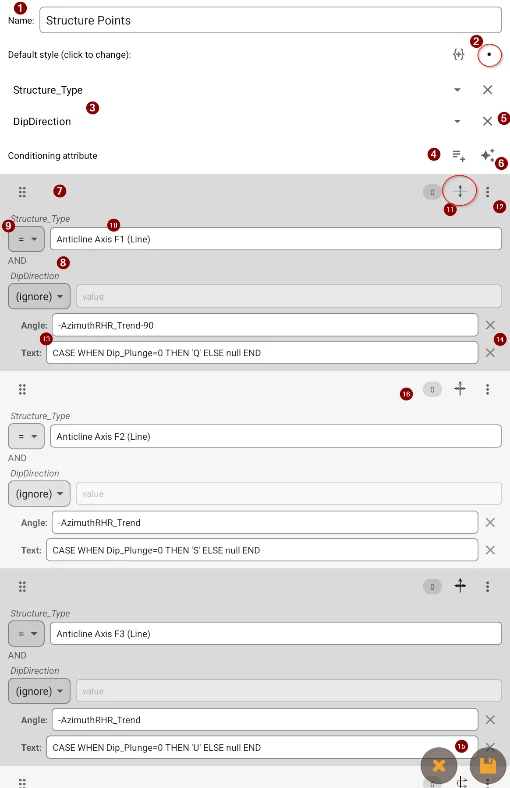
When creating a new style in a table with mixed geometries, you will be asked which type you want to affect before continuing.
In the first field ① you can assign a name to the dynamic style and, below ②, define the default style, which will be applied if none of the conditions we will see below are met. Initially the default style is disabled, which means that, if none of the conditions are met, each geometry's stored style will be shown. You can disable the default style by holding down on the icon.
Conditioning Attributes ③:
This field corresponds to a table attribute on which the system will base the style assignment. You can choose from 1 to 3 conditioning attributes, combined with each other using AND. The “Add conditioning attribute” ④ and “Remove attribute” ⑤ buttons, in the window header, let you add or remove attributes (up to 3); when you change the number, the terms of each existing case are automatically readjusted.
When you select it, the first condition ⑦ will appear. Conditions are evaluated from top to bottom, and the first one met across all its conditioning attributes will determine the style applied to that geometry. You can reorder them by dragging them with the icon  .
.
When several conditioning attributes are chosen, each condition is made up of one term per attribute; all terms ⑧ are combined with AND to determine whether the case is met. Any term can be marked as “(ignore)” to exclude it from that particular condition; if all terms of a condition are ignored, that case is skipped entirely and the row shows the warning “⚠ All terms ignored — this case is skipped”.
Each condition compares each tuple's conditioning attribute with a value —or an SQL expression, for advanced users— using the operators greater than, less than, equal, not equal, greater than or equal, and less than or equal, using the spinner ⑨ and a text field ⑩. If the condition is met, the style located to its right ⑪ is applied (tap it to modify it).
To delete a condition, tap the menu to its right ⑫, and to duplicate it, tap “Add condition” In the menu you will also find
“Add property function”, which lets you use SQL expressions to modify style attributes, based on certain table attributes ⑬. These functions can refer to specific columns, for example: Angle = ( 450 − acimut ) mod 360
where acimut is a column of the table, and Angle is a property of the symbol.
The application includes a generic dynamic style for the structures table (also included in the app). It is recommended to edit it to become familiar with this system.
You can remove each property function with the
X button to its right ⑭.Finally, the buttons at the bottom ⑮ let you save the dynamic style or exit without saving the changes.
Each case shows ⑯, in real time, the number of geometries it captures (cascading counter: each case counts only what the previous ones did not capture).
Automatic case generation ⑥: the Generate colors button creates the dynamic style's cases automatically. With a single conditioning attribute, it can be generated by codes (one color for each unique value of the attribute) or by ranges (Jenks natural breaks on numeric values), choosing the number of classes and the Palette: it includes sequential and diverging palettes (Viridis, Blues, YlOrRd, RdYlGn, RdBu), the Spectrum and Spectrum Grd rainbow palettes —the latter as a gradient, not cyclic— and the Set2 qualitative palette, used by default when generating by codes. The generated cases can then be edited individually.
With two or three conditioning attributes, the button also offers “Generate (cross product)”: it creates one case for each existing combination of values among the chosen attributes, varying two independent visual channels —color and geometry type (fill pattern in polygons, line type in lines, or symbol in points)— to distinguish more classes than a single color allows. The “Also vary the type” option enables the second channel; if left unchecked, only the color varies.
You've read enough. Try it with your own project.
20 days free, with your data. If you get stuck: the manual — and us.
Secure payment with Stripe · Cancel anytime.